A mini split can look like a simple garage upgrade: mount the indoor head, set the outdoor unit on a condenser pad or wall brackets, connect the refrigerant lines, and switch it on. But the electrical connection is not a place to improvise. An extension cord can overheat, cause voltage problems, and create a fire risk electrical inspectors and manufacturers take seriously.
The short version: mini splits should be powered exactly as their installation manual and nameplate require. That usually means a properly sized, dedicated circuit—not a household extension cord, power strip, or improvised adapter. The details vary by model, especially between 115V plug-in units and 230V systems, so check the specifications before buying or wiring anything.
Why an Extension Cord Is a Bad Fit
A mini split’s compressor and fan can draw substantial current, particularly when the system starts, ramps up, or works hard in extreme temperatures. A cord that seems adequate for a lamp or shop vacuum may not be rated for the mini split’s continuous load. The longer and thinner the cord, the more electrical resistance it has. Resistance produces heat and can also contribute to voltage drop.
That can lead to several problems:
- Overheating: A cord, plug, or receptacle can get hot when it carries a load beyond its rating. Damage may occur inside a plug or wall outlet before it is obvious from the outside. Voltage drop: Excessive voltage drop can interfere with reliable operation and may stress electrical components. A longer cord or undersized wire makes the problem more likely. Loose or poor connections: Extension-cord plugs can loosen, get bumped, or be exposed to dust, moisture, and garage traffic. Code and warranty problems: An extension cord may violate the installation instructions or local electrical requirements. That can complicate inspection, troubleshooting, or warranty claims.
So when people say “never use an extension cord,” they are not claiming that every cord will immediately catch fire. They are saying a cord is not a substitute for the branch circuit and wiring method the equipment was designed to use. A cord’s label, the unit’s nameplate, and the installation manual all matter.

Start With the Nameplate and Installation Manual
Before shopping for a breaker, outlet, wire, or disconnect, find the exact model’s electrical specifications. Look for the voltage, minimum circuit ampacity (MCA), and maximum overcurrent protection (MOCP), which may be listed as the maximum fuse or breaker size. These values guide the circuit and protection requirements; they are not interchangeable.
The breaker is not chosen simply by dividing the mini split’s advertised watts by the voltage. HVAC equipment can have specific rules for motor and compressor loads, and the manufacturer’s instructions set important limits. Wire size also depends on the permitted breaker size, conductor type, installation conditions, circuit length, and local code. If any of those details are unfamiliar, have a licensed electrician verify the design.
Also check whether the model is intended to be hardwired or uses a factory-supplied plug. Do not assume every 115V unit is plug-in, or that any standard outlet will do. Even when a model has a cord, its manual may specify the required receptacle, circuit rating, and whether that circuit can serve other loads.
115V Plug-In or 230V Dedicated Circuit?
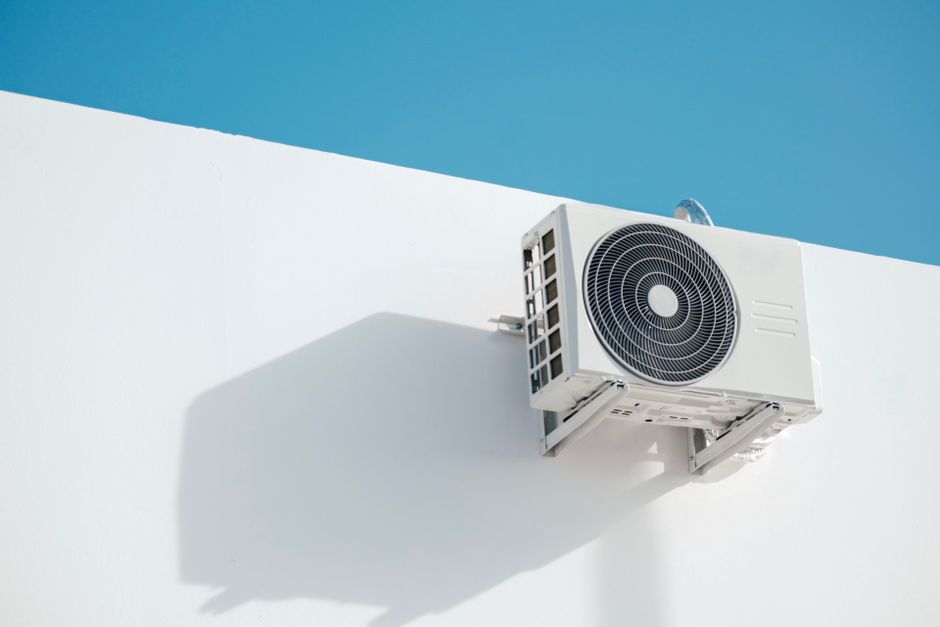
Some smaller mini splits are available in 115V versions, and certain models are designed to plug into a properly rated receptacle. That can make installation more convenient, but it does not mean you can safely run the unit from whichever garage outlet is closest. The outlet, branch circuit, and overcurrent protection must meet the exact manual requirements. A circuit shared with a freezer, power tools, lights, or other equipment may not be appropriate.
Many larger systems use 230V power and are hardwired to a dedicated circuit. A 230V unit generally needs the breaker and conductors specified by its manufacturer, plus a means of disconnecting power near the outdoor equipment as required by code. You cannot make a 115V outlet suitable for a 230V unit with a plug adapter. The equipment voltage, circuit, and protective devices must match.
Decision point 115V model 230V model Typical connection May be cord-and-plug or hardwired; confirm the exact model Usually hardwired, following the manual Existing garage power Must have the correctly rated circuit and receptacle Usually requires a suitable 230V branch circuit Extension cord? No, unless the manufacturer explicitly provides for a specific approved arrangement No; do not adapt or extend the connection with a household cord What to verify Voltage, MCA, MOCP, plug/receptacle, and circuit sharing Voltage, MCA, MOCP, conductor sizing, breaker, and disconnectChoosing between 115V and 230V is not just a matter of convenience. It depends on the unit’s capacity and design, available service, the circuit you can provide, and the manufacturer’s instructions. If the garage has only a crowded or questionable 115V circuit, that is not a reason to use an extension cord. It is a reason to plan an appropriate electrical upgrade or select equipment that genuinely matches the available supply.
What Is a Proper Disconnect Box?
A proper disconnect box is a local way to shut off power to the outdoor unit for service. Depending on the system and local code, it may be a non-fused or fused disconnect, and it must be rated and installed for the equipment and location. The installation instructions and local authority determine the details, including whether a disconnect is required and where it belongs. It is not the same thing as an extension cord or a general-purpose outdoor outlet.
Have the electrician confirm the breaker, wiring, grounding, disconnect, and weather protection as a complete installation. A correctly sized breaker does not make undersized wire safe, and a disconnect does not fix an overloaded branch circuit. If you are doing a permitted DIY installation, check the local rules before work begins; some jurisdictions require electrical work to be completed or inspected by a licensed professional.
Garage Sizing: Don’t Use an Interior-Room BTU Chart
A garage is not just another bedroom with a different paint color. It often has an uninsulated or poorly insulated overhead door, air leaks, exposed framing, a concrete slab, and heat gain through a roof or exterior walls. It may also have higher ceilings and frequent door openings. Those conditions can make the heating and cooling load very different from that of a finished interior room.
As a rough starting point, garage mini split sizing may land 30% to 50% higher than an interior-room estimate for a comparable floor area. Treat that as a planning warning, not a universal sizing formula. Insulation, air sealing, ceiling height, garage-door construction, climate, sun exposure, and how warm you want the space in winter all affect the load. A very well-insulated garage may need less of an increase; a tall, leaky garage in a cold-winter climate may need more careful analysis.
Before choosing BTUs, record the garage’s length, width, and ceiling height; note the number and construction of exterior walls; inspect the door and attic or ceiling insulation; and consider how often the overhead door opens. Think about whether you need occasional comfort while working or steady temperatures around the clock. For a high-performance or unusually large space, request a load calculation rather than relying on an online interior-room chart.
Oversizing is not automatically safer. An oversized system may cycle more than necessary in mild conditions, while an undersized system may struggle during the coldest weather. Check the model’s low-temperature heating performance as well as its headline BTU rating. In a cold garage, the capacity available at your design outdoor temperature matters more than the warm-weather maximum printed prominently on a product page.
Zone Air vs. MRCOOL for a DIY Garage Project
When comparing suppliers and equipment, separate the brand or retailer from the system’s installation requirements. MRCOOL is known for DIY-oriented mini split options, including product lines marketed around simplified connections. That can appeal to homeowners who want to handle parts of an installation themselves, but “DIY” does not mean “skip the electrical plan.” The circuit, breaker, disconnect, mounting, clearances, drainage, and local permit requirements still need to be handled correctly.
Zone Air may be a useful option to investigate for product selection or installation support, depending on the services and models available in your area. Compare what is actually included: equipment model, line-set length, accessories, support, warranty terms, and whether electrical work is included or referred to a qualified electrician. Avoid assuming that a retailer’s package includes a complete, code-compliant electrical installation unless it states that clearly.
Comparison point MRCOOL DIY-oriented option Zone Air option DIY approach Review the exact model’s DIY features and limits Ask what homeowner support or installation help is offered Electrical scope Confirm circuit, breaker, and disconnect requirements in the manual Confirm whether electrical work is included, separate, or referred out Line-set details Check included length, routing limits, and excess-line instructions Ask what line-set lengths and accessories are supplied Best next step Verify model-specific capacity, low-temperature performance, and warranty Request a written equipment and service scope before comparing pricesFor either route, read the current installation manual and warranty before purchase. Check whether the precharged or quick-connect line set must be used in a particular way, and what to do if it is longer than the installation requires. Do not assume you can coil surplus line behind the condenser; follow the manufacturer’s routing and minimum-bend guidance. Also confirm the unit’s electrical requirements before the delivery arrives. An inexpensive system is not a bargain if the garage needs a new circuit that was never included in the budget.
SEER2, HSPF2, and the Cost to Run It
SEER2 measures seasonal cooling efficiency, while https://annamaid.com/how-much-can-i-save-by-avoiding-a-new-230v-circuit-200-to-800/ HSPF2 measures seasonal heating efficiency. In general, higher ratings indicate greater efficiency under the applicable test conditions, but they do not tell the whole story about your garage’s operating cost. Actual use depends on climate, insulation, thermostat settings, equipment capacity, installation quality, and electricity rates.
To make a rough cost estimate, multiply the system’s electrical consumption in kilowatt-hours by your utility’s price per kilowatt-hour. The mini split power draw is not a single fixed number: inverter-driven systems ramp up and down, so the unit may draw far less at part load than at full output. Use manufacturer performance data and a realistic run-time estimate rather than treating the maximum input rating as its constant consumption.
In mrcool vs zone air a cold-winter garage, compare heating capacity and efficiency at low outdoor temperatures—not just HSPF2. Some systems lose capacity as it gets colder, and supplemental heat may be needed depending on your comfort target and the building envelope. Air sealing and insulation can reduce the load, improve comfort, and make the electrical and operating-cost plan more manageable.
A Safer Installation Checklist
Choose the exact model first. Confirm voltage, MCA, MOCP, capacity, and heating performance in the manufacturer’s documentation. Size the garage realistically. Account for ceiling height, insulation, air leakage, overhead-door construction, and local winter conditions. Plan the circuit. Have a qualified electrician verify conductor size, breaker, grounding, and whether the circuit must be dedicated. Include the disconnect. Confirm the proper disconnect box and its placement and rating for the equipment and local requirements. Mount the outdoor unit correctly. Use a stable condenser pad or suitable wall brackets, with required clearances and protection from snow, water, and debris. Skip the extension cord. Do not use a cord, power strip, plug adapter, or improvised wiring to make the equipment reach power. Check local permits and inspections. Requirements differ by location and may apply to electrical work even when the refrigeration connections are marketed as DIY-friendly.The Bottom Line
People warn against extension cords with mini splits because cords can overheat, create voltage drop, and bypass the circuit protection and installation method the equipment requires. Whether you choose a 115V model designed for a specific receptacle or a 230V system on a dedicated circuit, follow the exact manual and nameplate. Plan for the proper disconnect box, verify electrical work before installation, and size the unit for the garage—not a bedroom chart.
A careful plan can make a DIY-friendly system practical, but electrical shortcuts are not part of a safe DIY installation. If you are uncertain about the circuit, breaker, wiring, or disconnect, bring in a licensed electrician before powering the unit.